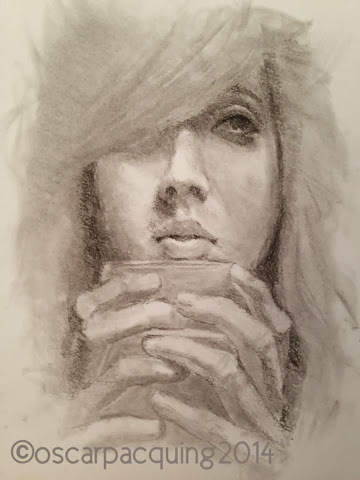
Artist Casey Baugh's demo emphasized his approach on drawing/painting, and they are in the following sequence: value, color (if you're using it), edges, and then drawing.
I started throwing in smudges of charcoal powder to where I think the dark tones are going to be mostly. In the pic at bottom such case is the bangs on the face, the sides, and the area where the hands are going to be.
Next I started sculpting the figure with the use of a kneaded eraser. At the same time I began attacking the darker tones with the use soft charcoal vine, trying to define that soft and hard edges of the face. At this stage I didn't have to worry about the details- just block in the eyes socket, nose and lips. Repeat the same process moving on to the glass and fingers. At this stage think of mass of values, not lines and boundaries. To push the smudges smoothly I use Sofft knives or you can use stumps or the ever handy cute tips.
Next stage as showing at the middle pic, continue working on the edges and some details, slowly sculpting to its likeness. Use the eraser for defining reflected lights and widened your tones from the darkest to the lightest.
I try to stay loose as I work on its likeness and give a bit of my interpretation for a more original version. Don't be so uptight on details that you desperately want to perfect the likeness. It's going to drive you crazy. This exercise is suppose to be "cruise drive".
Reference for this is a photo. The tools I used are the following: charcoal powder, soft sable brush, soft charcoal vine, soft charcoal pencil, stump and Sofft knife, and a kneaded eraser.
I hope you find this little tip helpful for your own drawing journey. Happy drawing!!!


No comments:
Post a Comment